
Userify @ AWS
Get up and running in seconds with our fast and easy to configure Userify AWS editions.
Launch in EC2 Contact UsSECURE SSH Key Management
Userify works seamlessly across your Clouds and Datacenters
Security
Active Session Termination terminates active sessions of removed users for added security.
Learn more..User Management
User-specific profile pages allow for easy management of access permissions for individual users.
Learn more..Regulatory Compliance
Permission-Based Access ensures that access to sensitive information is restricted to authorized users.
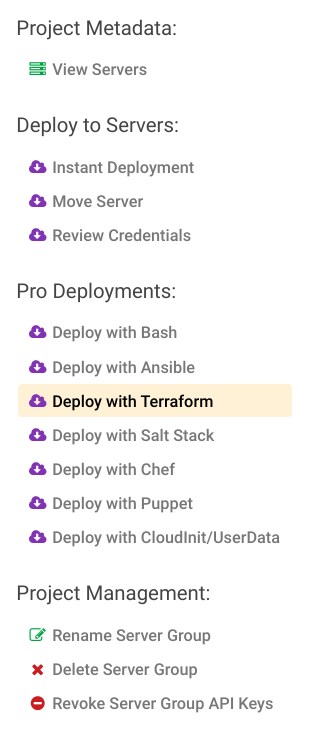
Learn more..Instant Integrations
Easy Deployment options, such as "instant deploy" and "Deploy with Terraform" makes Userify simple to set up and manage.
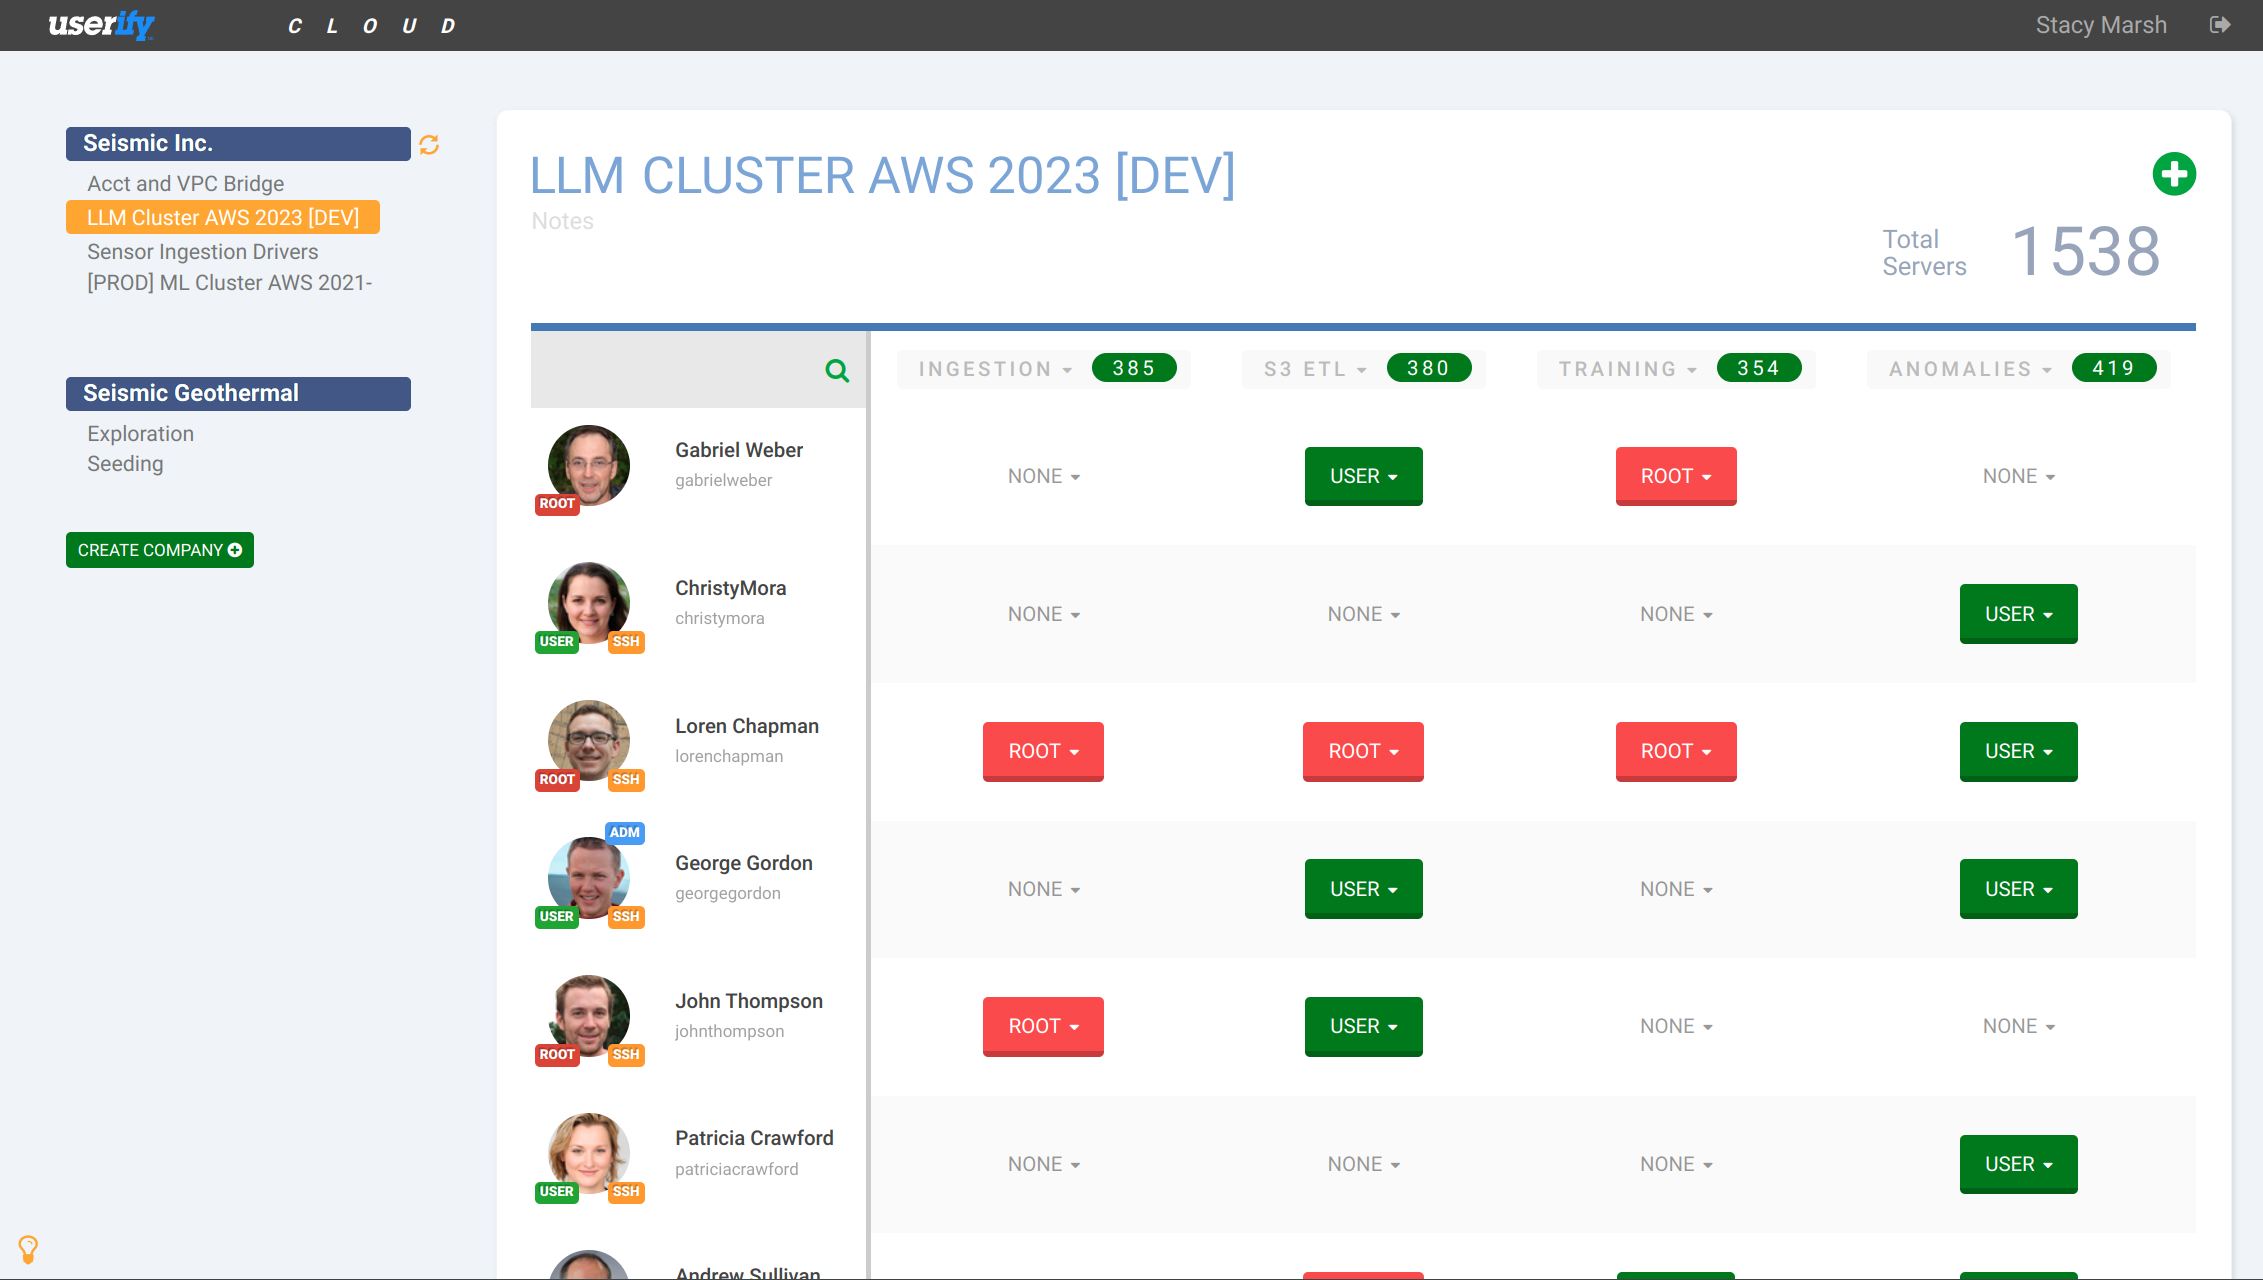
Learn more..Permissions Visibility
Userify presents a graphical layout of users and server groups, allowing easy identification of access permissions.
Learn more..Easy Management
Servers stay in sync with Userify automatically, so there is no need to manually update access permissions.
Learn more..Design to Scale
Cloud-Based Architecture for Auto-Scaling and Load-Balanced Virtual Machines
Learn more..Active Directory
Userify Enterprise seamlessly enables centralized management of user access across Windows and Linux.
Learn more..Trusted by more than 5,000 Teams Worldwide


Getting SSH keys under control has never been this easy!
It seems like there's an explosion of users on all of our platforms and clouds -- employees, contractors, and off-shore developers all having privileged access to our most sensitive assets. Only Userify makes organizing, and safely removing their access so easy!
... in 100ms

Userify AWS Features
Private VPC
Run Userify in your own VPC at AWS and keep it completely private.
Custom Mail Server
Configure Userify to send notifications with your own mail server or Amazon SES.
Automatic TLS Certificate Generation
Lets Encrypt for automatic TLS certificate generation (userify.example.com)
Ease of Configuration and Setup
Userify is designed for rapid and easy configuration and setup, so you can be up and running in no time.
High Security Standards
Userify is known for its high security standards, and Userify at AWS is no exception. You can trust that your data is safe and secure with Userify.
Personalized Key Dashboards
Each user gets their own personalized key dashboard, making it easy to keep track of and manage your keys.
Built-In Deployment Templates
All versions of Userify can be deployed with built-in templates for Ansible, chef, puppet, AWS Cloud Formation, Salt Stack, Terraform, and shell scripting, making it easy to integrate into your existing infrastructure.